Monday, January 12, 2015

Murukku


There are some things that taste good , only when its homemade. Murukku is one such snack.
I haven't tasted any store bought ones that tastes as good as my mother's or my grandmother's homemade ones.
For those who don't know what murukku is, its a crunchy yummy south Indian snack made of rice flour and urad dal flour (black gram) and some spices.
Usually in Hindu families these are  made as special treats for celebrations like diwali. In our house, my mom used to make it every now and then, like during school vacation time, or when someone goes back to college after holidays or whenever she had a few days off.
Its a bit time consuming process, making the dough to the right consistency and pressing it using the preser, but the end results absolutely worth it. Once you start making them home, i promise you won't go back to the store bought ones.

Murukku

Nikki

Recipe adapted from here

Ingredients

  • Rice flour: 1 cup
  • Urad dal flour (black gram): 1/4 cup
  • Asafoetida: 1/8 tsp
  • Cumin seed: 1 tsp
  • Butter: 1 tbsp
  • Warm water: as required
  • Salt: as per taste
  • Chili powder: 1/4 tsp (optional)
  • Oil: enough for deep frying

Instructions

To make urad dal flour 

  1. Heat a pan on medium flame and dry roast urad dal, until it turns light brown in color and you get a nice aroma.
  2. Let it cool, and grind it to a fine powder. Sieve to separate the grains and grind the grains again to a fine powder.

To make rice flour

  1. Soak rice in water for 2 hrs. Wash and drain the rice and spread it on a clean kitchen towel.
  2. Once it gets partially dry, grind the rice to a fine powder.
  3. Sieve the powdered flour to separate any big grains, and grind the grains again to a fine powder.
  4. Heat a pan on medium flame and dry roast the rice flour until you get the nice roasted aroma.

How to make murukku

  1. In a mixing bowl, mix together the rice flour, urad dal flour, hing, cumin seeds, salt and butter.
  2. Add warm water to this mixture little by little, kneading with your hand until we get a smooth non sticky dough like the roti dough.
  3. Prepare the murukku presser with the star shaped template. Take a some dough and shape it like a cylinder by hand and fill in the presser.
  4. Take a parchment sheet and press the murukku on the sheet in small spiral shapes.
  5. Heat enough oil in a pan for deep frying. When oil gets really hot, drop 3-4 murukkus at a time and fry till it turns light brown on both sides.
  6. Drain on a paper towel and let them cool.
  7. Store in an air tight container, stays fresh for 2 - 3 weeks.
Notes:
  • There is more info about the murukku press in my Pakkavada recipe post. Can be easily found in any Indian store.
  • I used store bought rice flour. My mother makes big batches of homemade flour which enhances the taste. But good quality store bought rice flour and does a pretty good job.
  • If you have a flat slotted spoon, use that to get the spiral shaped dough off the parchment paper and to slide it into the oil for frying. This avoids the pressed dough from breaking apart.
  • Its always a good idea to double or triple the recipe to get a good big batch of murukkus. But for first time, always try with the quantities mentioned in the recipe and make sure you get the right crunchiness and taste.

Friday, November 28, 2014

Semiya payasam(Vermicelli kheer)


Payasam is something I have seen my mom make for birthdays and other special occasions.So even I follow the same practice. Me personally not a big fan of sweets and sweet delicacies, but the rest of my family is. Especially, my husband. Last week, it was his birthday and this payasam was the birthday special.
My mom has a secret ingredient in the payasam recipe, sweetened condensed milk. It makes the payasam rich and creamy, also yummy too.

Usually it is made with just milk and by letting it reduce to get the creamy consistency, which calls for cooking for quite a long time. Well, if there are things like a can of condensed milk that makes life easier, why not go for it ;)
Give it a try, you will like it...next time when its your turn to bring a dessert for the potluck, make a payasam...make ahead and put in the fridge, even better :) omg, life can't get any better..

Semiya payasam (Vermicelli kheer)

Nikki

Ingredients

  • Vermicelli: 1/2 cup
  • Milk: 2 1/2 cups
  • Ghee: 2 tbsp
  • Condensed milk: 1/2 a tin
  • Raisins :2 tbsp
  • Nuts: 2 tbsp ( cashew/almond/pista)
  • Sugar: 4 tbsp**
  • Cardamom: 2 nos(crushed using mortar pestle)
**Check the sweetness before adding the sugar, if the condensed milk has already given the required sweetness, can skip the sugar in the recipe.

Instructions

  1. Heat ghee in a heavy bottom nonstick sauce pan.Add the nuts and fry until its lightly browned, drain. Add raisins and fry until it puffs up and drain. Set aside for garnishing.
  2. In the remaining ghee, add the vermicelli and roast on medium low flame until it turns light golden brown.
  3. Add milk, give it a good stir. Cover and cook for 6-8 min until the vermicelli is cooked completely.
  4. Add the sugar and condensed milk and mix it all together and cook for another few min, until the payasam starts thickening.
  5. Add the crushed cardamom and garnish with nuts and raisins.
Serve it hot or chill it in the refrigerator, however you like it :)

Note: Don't let the payasam thicken completely while cooking. It thickens as it sits.If it get gets too thick, add some warm milk to it before serving.

Wednesday, November 19, 2014

Banana bread


This recipe is dedicated to everyone out there who have over ripe bananas sitting and staring at you in the fruit basket.We all (except hubby dear) eat banana in our house. But the minute you see the brown spots on the peels nobody wants them. Then they start sitting there day after day begging for some attention.
This happens every other week in our house and I desperately needed a way to use them.I can't simply throw food. I get it from my mom, I guess.


This hunt for a recipe to use the mushy bananas in our house, got me to this banana bread.Yummm
Its tasty, everyone loves it, healthy too if you use a portion of wheat flour in it.
You can reduce the sugar to an extend, because the bananas have their role to play, which makes this bread again healthy.All in all its a win win. I get to use the over ripe bananas, kids get a yummy snack,even the banana hater hubby likes them. What more can you ask for ;)
So no more unattended mushy bananas, easy to put together , lets get going :)

Banana bread

ikki
Adapted from here

Ingredients

  • Banana:3-4 nos (over ripe ones)
  • All purpose flour: 2 cups
  • Butter: 1/2 cup
  • Sugar: 3/4 cup
  • Salt: 1/2 tsp
  • Vanilla essence: 1 tsp
  • Egg: 2 eggs
  • Baking soda: 1 tsp

Instructions

  1. Peel the bananas and put them in a mixing bowl. Mash it really well with a fork.Add the butter and sugar and mix well.Add eggs one at a time, mixing well in between. Add the vanilla essence.
  2. Sift together the dry ingredients, ie; flour, salt and baking soda.
  3. Add the dry ingredients to the banana mixture in two batches, mixing well in between.
  4. Pour it into to a 5x9 loaf pan and bake for 55-60 min, until a tester inserted into the middle of the bread comes out clean.
P.S: If you want the kiddos to eat them, pour the batter into a muffin pan and present it as banana muffin.Stir in some chopped nuts of your choice, you have banana nut muffin. Top it with some streusel :)

Friday, November 14, 2014

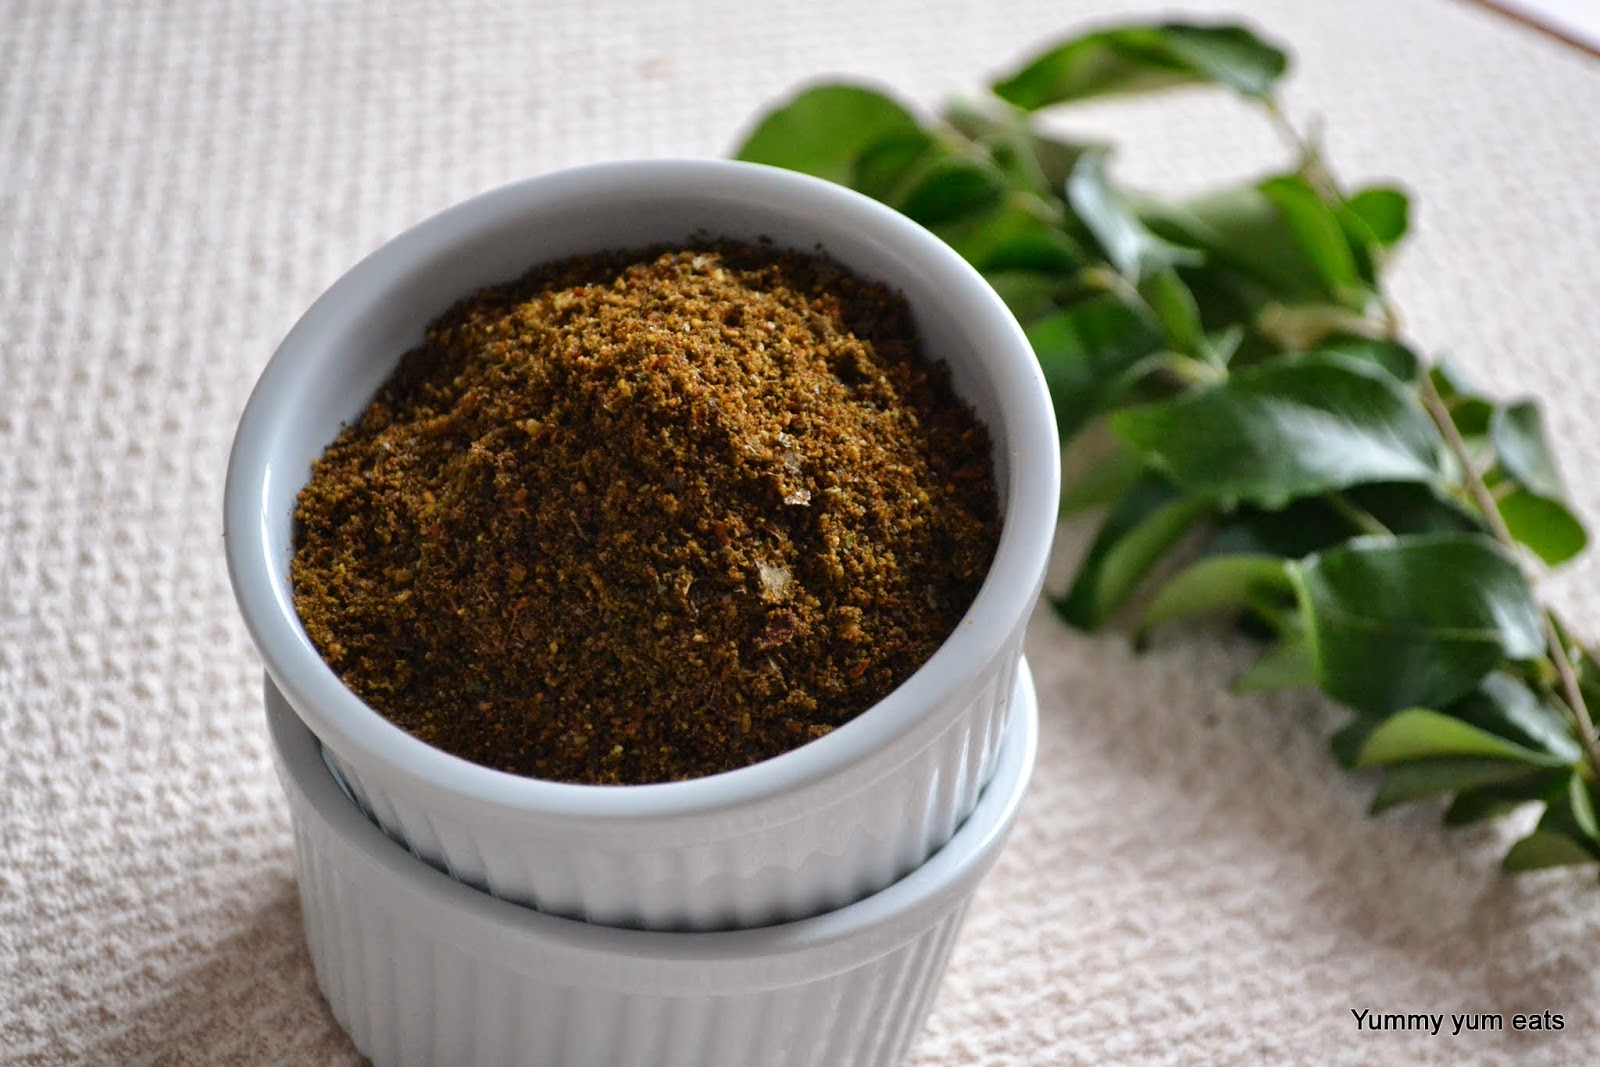
Vepilakatti (Curry leaves chutney powder)


I graduated from a college far off from my hometown.I used to stay in the college hostel and got to visit my home maybe like once in a month or so. My mom used to pack me all kind of stuffs to eat, say pickles n snacks and what not. The hostel only provided vegetarian food, which was fine with me, but the menu they had was way too different from ours.Then I used to literally survive on these goodies my mom used to sent me with.Not only me, but my roommates and friends also loved them. After college, we get back and munch on the homemade snacks amma made along with the watery cup of tea.

Every time I go to the canteen, I will have a bottle of pickle or some chutney powder, which would help us with that meal of the day.I really don't know how I would have survived without those..Thanks to amma, lots of things we have in life is taken for granted..I guess this is one of such things..don't think we have thanked amma enough for all she had done for us sisters.She used to do the same for all three of us, who all stayed away from home for studies and work.Nostalgia creeping in, i guess..Before I bore you more, let me get on to today's recipe.
Its called vepilakatti, which is curry leaves chutney powder. "vepilla" is the malayalam word for curry leaves.
The best thing about vepilakatti is,it stays fresh for almost a month without refrigeration.
Amma used to send things that stays fresh without being kept in the fridge, yeah, of course we didnt have access to a fridge in our college hostel. And all these dry chutney powders saved a lot of us.
Even today, this is my go to food when I am sick or feeling low. Vepilakatti, steaming hot rice and curd. Nothing the world can beat this combo.

Vepilakatti (Curry leaves chutney powder)

Nikki
Published 11/14/2014

Ingredients

  • Curry leaves: 2 cups, loosely packed
  • Grated coconut: around 4 cups (from one coconut)
  • Shallots: 10 nos
  • Dry whole chili: 7-8nos
  • Tamarind: a small lemon sized piece
  • Oil: 2 tbsp (preferably coconut oil) 
  • Salt: as per taste

Instructions

  1. Wash and dry the curry leaves on a kitchen towel. Peel the shallots and cut into halves.
  2. Heat oil in a pan on medium heat.Add the whole chillis and fry for 2 min, add the shallot pieces,grated coconut and fry for 5 min.
  3. Add the tamarind piece and the curry leaves and stir well continuously until the coconut turns slightly golden brown in color and becomes crispy.
  4. Turn off the flame and let it cool for a while.Once completely cooled, transfer to a mixer, add the salt and grind to a fine powder.
Store in an airtight container. Stays fresh in the pantry for 3-4 weeks.Make sure you use a dry spoon every time you devour it :)

P.S: Feel free to add more curry leaves if you have it on hand.

Wednesday, November 12, 2014

Parippu manga curry (Dal & raw mango curry)


We Indians have dal on our plates almost every day in one form or the other.Its kind of our staple food. Dal with rice, dal with roti, its an all time favorite in our house. My hubby can survive on dal and roti for days together without complaining ;)
Be it plain dal tadka, or sambhar or rasam, i love it. We all love it. Every time we travel out of home for a few days and don't get to eat Indian food, we all would be dying to get back home and eat hot rice with dal. It relaxes everyone in our family.
Parippu manga is another version of dal, i would say its the tangy version. Because it has raw mango in it.yumm...i am in for anything tangy or spicy :)
The ground coconut gives the rich texture to the curry.Simple, but a different flavor of dal. This is one of my all time favorite curries. I guess its more of a south indian, or to be precise Kerala take on dal.
Have it with steaming white rice and a sabzi( vegetable stir fry), oh my, that makes me one happy soul ;)

Parippu manga curry (Dal and raw mango)

Nikki
Published 11/12/2014

Ingredients

  • Toor dal : 1 cup
  • Raw mango: 1 no, medium sized
  • Grated coconut: 1/2 cup
  • Turmeric powder : 1/2 tsp
  • Chili powder: 1/2 tsp
  • Salt: 1/2 - 3/4 tsp

For Tempering:

  • Coconut oil: 1 1/2 tbsp
  • Mustard seed: 1 tsp
  • Curry leaves: a few sprigs
  • dry whole chili: 3-4 nos, cut into halves

Instructions

  1. Wash and cook the dal in the pressure cooker with turmeric powder and chili powder with 2 cups of water. The dal should be cooked really mushy.
  2. Peel the mango and cut the slices into small cubes and add to the cooked dal. Add salt and 1/4 cup water, cover and cook for 2 min.
  3. Grind coconut with a few table spoons of water, into very fine paste.
  4. Once the mango pieces gets cooked, add the ground coconut paste and boil for a few minutes. Add a little bit of water if the curry is too thick.Check the salt level and turn off the flame.
  5. For the tempering, heat oil in a small pan, add mustard seed. Once it splatters, reduce the flame and add the dry whole chili pieces and curry leaves. Turn off and add it to the currry.
Serve with hot rice and paapad. Stays fresh for couple of days in the fridge.
P.S: The curry thickens when it sits, so make sure to leave it watery enough when you finish cooking.

Monday, November 10, 2014

Pepper chicken


My mother makes a meat masala at home.It adds all the good flavours to any nonveg curries she makes. Every time one of us visits her, she makes it for us, and it lasts for almost a year. Its like if you have it handy you don't dread cooking chicken or beef....and as soon as you are out of  it, you get a kind of panic attack.
Its like you get appreciated for the yummy chicken fry you made, but its got nothing to do with your cooking skills, its all amma's masala...its like a little secret in your spice stash :)
I stumbled upon this recipe at mariasmenu when I didn't have amma's meat masala on hand, and wanted to make a chicken fry for a Sunday lunch.
Its the fresh pepper that attracted me to this recipe. I like chicken spicy. By spicy i mean, i should get the taste of the gravy first and then the meat. And this recipe did justice to it.

Pepper chicken

Nikki
Adapted from here

Ingredients

  • Chicken: 1 whole chicken, cut into medium sized pieces
  • Pepper powder: 1 tsp (for marination)
  • Lemon juice: 2tsp
  • Salt: as per taste
  • Onion: 3 nos, medium sized, thinly sliced
  • Ginger garlic paste: 2 tbsp
  • Whole black peppercorn: 2tsp
  • Green chilli: 4 nos
  • Garam masala: 1 tsp
  • Meat masala: 1tsp
  • Turmeric powder: 1/2 tsp
  • Fennel powder(perumjeerakam): 1/2 tsp
  • Soya sauce: 2tsp
  • Tomato sauce: 2 tsp
  • Curry leaves: a few sprigs

Instructions

  1. Marinate chicken pieces with pepper powder, lemon juice and salt. Keep it aside for 2 hours
  2. Crush the whole pepper using mortar & pestle. Heat a skillet on medium heat.Add oil and sliced onion. Add ginger garlic paste,green chili and saute for 5 min till the onion turns brown and translucent.Add crushed pepper, garam masala, meat masala, turmeric powder and fennel powder.Mix it all together.Add soya sauce and tomato sauce.To this add the marinated chicken pieces. Combine everything together and let the chicken pieces get coated with the masala.
  3. Once the chicken starts cooking, add half a cup of water and mix everything together and let it boil. Reduce the flame, cover with the lid and let it cook till the chicken is completely done, stirring in between.Once chicken is cooked, open the lid and dry roast for another 5 min. Serve it hot with white rice or roti

Thursday, October 23, 2014

Pudina thogayal / Mint thogayal (Mint chutney)


Mint has a very distinct flavour compared to coriander leaves or cilantro, which is a staple herb in every Indian kitchen.
In the part of the world were we live, we don't get mint that commonly in the market as we find the other herbs. So we tend to use it rarely and only when its an unavoidable ingredient .like say for Biriyani. I would say mint flavour is the heart of a tasty chicken biriyani...
But luckily, the place we stayed earlier, we had a abundant mint supply in the backyard itself. After months long of dead winter, one fine day i would wake up to see this surprising new sprigs of mint. The first time I saw it, i was totally taken aback.really, how did it survive this severe winter and snow. I used to have a lot of them that I could share a bunch every now and then with my friends too.Our house used to smell heavenly when we cut a fresh bunch of them.

Because of limited availability, my options with mint were also limited, say in biriyani and this mint chutney occasionally.
Now since I had this surplus mint supply, went out looking for more ways to use it.
And found a delicious thogayal (chutney like paste) at rakskitchen. My mom had made it a couple of times earlier and I had liked it then. So thought of giving it a try. And it is good. I like the tang of this thogayal. It refreshes you :)
Easy to put together, a very few ingredients too
Goes well with Idli, dosa, also as a condiment with rice.
Can be used to dress up a plain old cracker or a toast too, more like a spread.

Pudina thogayal / Mint thogayal (Mint chutney)

Nikki
Published 10/23/2014
Adapted from here

Ingredients

  • Mint leaves: I cup (tightly packed)
  • Whole red chillies: 10-12 nos
  • Urad daal: 2 tbsp
  • Grated coconut: 2 tbsp
  • Tamarind: a small piece (in size of a gooseberry)/ 1/2 tsp, if using paste
  • Jaggery: 1 tsp
  • Salt: 1 1/2 tsp

Instructions

  1. Place a nonstick pan on medium heat and dry roast whole chillies and urad daal until it turns golden brown.
  2. Add the mint leaves and tamarind and cook for a minute, until the leaves wilt and reduce in volume.
  3. Let the mixture cool down, once cooled, grind it into a smooth paste along with grated coconut, jaggery and salt.

Tuesday, October 21, 2014

Chunky Peach preserve


Ok, let me not start with my usual lame excuses for not updating this space for quite a long long time.
Because I don't have any good one expect for the fact that I was lazy. there you go.. i said it.
You call it writers block, lack of mojjo or whatever, I say its plain old laziness.

So now you would be wondering why I am writing this post....hmmm
A few days back my dear hubby was telling me, "Failure to plan is planning to fail".
C'mon, its me who get to use all the "quotes" in this house.( of course on him ;) )..you know..men men men
And for the first time he got to use one on me...oh no! it felt like one tight slap
Any way, I hope I will post more frequently here after....I have to...at least to save my face

Its always towards the end of summer I get the urge to utilize the abundant supply of stone fruits that summer offers and preserve them for the rest of the year. I guess, one reason for that is, I don't want to let go of the summer...and also because I find it really hard to embrace fall n winter...yeah I hate cold weather and all that comes with it....The very sight of peaches, plums, nectarines all their cousins on the fruit stand in the farmers market makes my day. its such a visual treat..I love summer and all these yummy fruits. 


This peach preserve is a very versatile thing..can be used in a cake, or in a pie or use as a topping in any kind of pudding desserts,ice creams or simply just spread it on your Sunday morning toast and enjoy :)

Chunky peach preserve

Nikki
Published 10/21/2014

Ingredients

  • Peaches: 3 lbs (ripe and firm ones)
  • Sugar: (5 cups)*
  • Lemon juice: 2/3 cup

Instructions

  1. Wash and dry the fruits and cut a X on the rounded edge.Bring a large pot of water to boil and add the peaches to it, a few at a time and blanch them for 30 sec.
  2. Transfer to a bowl of ice water immediately to stop cooking. Let it cool, once cooled peel them from the X cut we made.
  3. Cut each peach into 6-8 wedges and each wedge into 3 pieces. Put them in a large bowl and add sugar and lemon juice and mix well. Let it stand for a few hours or even overnight, stirring it 2 -3 times in between until the sugar dissolves completely.
  4. Transfer the mixture to a large pot and cook it on moderate heat for 25- 30 min , until the syrup thickens and the peaches become soft.Skim off any white films that collects on the surface while cooking.
  5. Let cool the mixture, cover and let it rest overnight. Drain the fruits from the mixture using a sieve and set aside. Bring back the syrup to a boil on moderate heat for a few minutes, until it reaches the jam like consistency. To check the consistency, pour a spoonful of the syrup in a chilled plate and wait for a couple of minutes to cool down. If it thickens to a jam like consistency, you have got it rite.
  6. Add back the drained fruit pieces to the syrup and mix it all together and cook for a couple more minutes.
  7. Remove from the heat, let it cool and transfer to jars and wipe the rims with clean cloth. Crack open the lid until it cools down completely. Once completely cooled, tighten the lids and store in a cool place.


*I used only 4 cups of sugar in mine, because I like things less sweet. Adjust it to your sweet tooth level by tasting the mixture.

P.S: I leave mine in the pantry and it stays fresh for almost a year. You can also refrigerate it, if you want to keep it longer

And I'll see you all soon....i'm not kidding ;)

Wednesday, August 28, 2013

Baked Crispy Kale chips


Okay, let me be very frank...I have never bought  this veggie though I have seen it every time i go the produce section of the super market.
I have told you earlier too, my veggie choices were very limited :)
Of late, I have been seeing these kale chips all over the blogging world...wanna give it a try.
believe me, it tastes heavenly good.
ta dah, one more veggie in my so called "veggie choices".


We have the habit of having something crispy with our lunch. ie; with rice, dal and sabzi. Mostly we have paapad, at times when we don''t have paapad, we opt for plain old lays chips too..but we need something crispy..that is the rule :)
Now a days these kale chips have taken paapad's place.
They are baked, its a veggie, its crispy and above all its yummy.. C'mon, what more you can ask for?
Next time, when you go, get a fresh bunch of this beautiful veggie, and try these chips. you are gonna love it.

Recipe adapted from here


Baked Crispy Kale chips

Ingredients

  • Kale: I bunch (the curly kind)
  • Olive oil: 1 tbsp
  • Salt: 1 tsp

Instructions

  1. Preheat oven to 350 F.
  2. Line a cookie sheet with parchment paper.
  3. Wash the kale leaves thoroughly and dry it well on the kitchen towel. Use a salad spinner, if you have one.
  4. Remove leaves from the thick stem using a knife or kitchen shears and tear them into bite sized pieces.
  5. Drizzle kale leaves with olive oil and sprinkle with salt.
  6. Spread the leaves on the prepared cookie sheet, with the curly side down. Bake for 10-12 min until the kale leaves get crispy in the edges. For even baking, give the leaves a stir, half way through baking. Cool them completely before storing in an airtight container.
Next time you have those hunger pangs, munch on these yummy healthy snacks ;)


Saturday, August 24, 2013

Strawberry Banana popsicle


Who doesn't like popsicles? that too in this hot summer season.
My kids love them. Actually they prefer popsicles to ice cream :) Even I love them. Ice cream is a bit too sweet for me. I guess, my li'l ones have got my taste buds ;)
Its fun to see them run around with these popsicles in their hands...dripping it all over the house...well, cleaning up the mess isn't that fun, though :)
Mango smoothie is my li'l one's favorite flavor. I like the strawberry banana flavor, may be because of the tart.


This is an easy summer treat that pleases everyone...especially the kids and even the little kids in us too :)
Make it fancy, by alternately layering the strawberry and banana mixture.
Or, if in a hurry, blend everything together, still you have a delicious treat on hand.

Here is the recipe: Adapted from here

You'll need:

Strawberries: 1 lb (washed and hulled)
Lemon juice: 1 tbsp
Sugar: 3 tbsp
Banana: 2 nos (mashed)
Yogurt: 1/2 cup
Vanilla extract: 1 tsp


How to make:

Blend strawberries, 2 tbsp of sugar and lemon juice in a blender until smooth.
Pour half of the strawberry mixture into the molds, ie; filling about 1/3 of the molds. And put it in the freezer for a few min.
Meanwhile,in a bowl, mix mashed banana, yogurt and the vanilla extract until combined.
Pour the banana mixture into the molds, filling molds 2/3 full.
Pour the remaining strawberry mixture on the top.
Freeze at least 5-6 hrs or overnight, until completely frozen.
Once frozen, show the molds under warm running water to get the popsicles out easily.


Tuesday, August 20, 2013

Zucchini Bread


Four to five years back, i haven't even heard of this vegetable, zucchini.
One day, at work, one of my colleague brought this delicious cake and said its zucchini bread.
A yummy cake using a vegetable..I was all excited about the idea :)
I ate a piece and fell in love with it, though I had know idea what zucchini was or how it looked like.
Anyway, during my next trip to the grocery store,i went straight to the produce section looking for this mystery vegetable, and grabbed a couple of them.


Since then every summer, I make this delightful bread a number of times.
One of everybody's fav evening snack. (Can also be a breakfast too)
Easy to bake, calls for vegetable oil instead of butter, lots of veggie, all in all a win-win.
Even today, there are lots of veggies in the produce aisle I haven't given a try. I guess, I have to think outside the box (I mean, outside my limited staple vegetable choices)
I use zucchini in stir-fries too. It tastes so good.


Here is the recipe, adapted from allrecipes.com

You'll need:
Recipe makes 1 loaf

All purpose flour: 1 1/2 cups
Sugar: 1 cup
Eggs: 2 nos
Vegetable Oil: 1/2 cup
Baking soda: 1/2 tsp
Baking powder: 1/2 tsp
Zucchini: 1 cup (grated)
Salt: 1/2 tsp
Vanilla extract: 1 1/2 tsp
Ground cinnamon: 1 1/2 tsp
Chopped walnut: 1/2 cup


How to make:

Preheat oven to 325 degree F.
Grease and flour a 8 x 4 inch loaf pan.
Sift together flour, salt,cinnamon powder, baking powder and baking soda in a bowl.
In a large bowl, beat the eggs, add the sugar, oil and the vanilla extract.
Mix in the sifted ingredients to the creamed mixture and beat well.
Stir in the grated zucchini and chopped nuts and mix well until combined.
Transfer the batter into the prepared pan.
Bake for 40-50 min, or until the tester inserted in the center of the cake comes out clean.
Cool the pan on a rack for a few mins.
Enjoy the cake or the bread, what ever you call it...i guarantee,  its gonna taste good :)


Wednesday, August 7, 2013

Upside down plum cake


Don't you love to bake all these fancy cakes...I do...Its my first time baking an upside down cake. I have always wanted try the upside down pineapple cake.
But, its summer time and have lots of stone fruits handy...so tried this plum cake...look at that! isn't she a beauty :) an absolute treat for the eyes...also for your tummy too.
I did make some plum jam too...recipe coming soon...
Don't get carried away by the looks..This cake is pretty simple to make. The cake part is just easy as any ordinary pound cake.
And you can go all artistic in arranging the plum slices :)


This is what I like about summer....I get to do a lot with peaches, plums, mangoes, zucchini, water melon, avocados, corn, cherries and what not?
I guess some people are born to eat, and our family is definitely one of them :)
How about you? 

Here is the recipe

You'll need:

6 large plums,each pitted and cut into 8 wedges
All purpose flour: 1 1/2 cups
Butter, unsalted: 1 1/2 stick (12 tbsp), softened
Sugar: 3/4 cup
Brown sugar: 3/4 cup (for the topping)
Baking powder: 2 tsp
Vanilla extract: 1 tsp
Milk: 1/2 cup
Eggs: 2 nos
Ground cinnamon: 1/2 tsp
Salt: 1/4 tsp

How to make:

Preheat oven to 350 degree F.
In a small sauce pan melt 4 tbsp of butter. Once the butter melts and start turning brown in color, immediately add the brown sugar. Cook butter and sugar, stirring continuously, for 2-3 min.
Pour the mixture into a greased 9 inch cake pan, spreading all over the bottom of the pan using a spatula.
Arrange plum slices in overlapping concentric circles on top of the butter-sugar mixture.

Sift together the flour, baking powder, salt and cinnamon powder.

In  large bowl, beat the remaining 8 tbsp of butter and sugar together using an electric mixer.
Add eggs, one by one, beating constantly. Add in the vanilla extract.
Add the dry ingredients, alternately with milk and continue beating until light and fluffy.
Spread cake batter on top of the plum. Bake for 40-45 min until an inserted tooth pick comes out clean.
Let cool for a few min, and flip over the cake on to a plate.
tah- dah!!! Enjoy your slice with vanilla ice cream on top :)


Monday, August 5, 2013

Mint chutney / Pudina chutney with coconut recipe


I love backyard gardens. I always wanted to have a backyard garden ever since I got married. Not that I have one now, but these days we live in the ground floor, and I have a little space around our patio, which i try to turn into a small vegetable garden.
I have got this from my mom.Have you ever wondered how most of our habits, likes, dislikes, we get from our parents.I guess, that is what these genes do, huh?
My mom always keeps here backyard garden active with the seasonal plants. And I have seen her proudly sharing her farm fresh produce with her neighbors :)


Surprisingly this spring, I started seeing a few mint plants in my so called garden, which gradually took over the entire space. I said surprisingly, because I didn't plant them. I assume the previous tenant would have had some, but this is the first time I am seeing mint leaves spreading like weeds.
Anybody passing by smells these wonderful herb, and asks me, is that mint (read, can I have some of those mint leaves)
Even I share much of it with my neighbors, because i use mint only for biriyani and bombay sandwich chutney. (now you see the genes thing I said above, right ;)
I usually make coriander chutney for dosa and idli. But have tasted the mint chutney in some authentic Tamil restaurants.I love the tang of this chutney.
Now that I had some much of mint leaves on hand, I made this chutney for a change. I liked it.

Here is the recipe.

You'll need:

Mint leaves: 3/4 cup (loosely packed)
Grated coconut: 3/4 cup
Roasted gram daal (Pottukadalai) : 2 tbsp
Ginger: a small piece
Tamarind: a small piece
Green chilli: 3-4 nos
Salt: as per taste 

How to make:

Wash and drain the mint leaves.
Heat a pan on medium-low flame and saute the mint leaves, until it shrinks in volume.
Grind together the mint leaves, grated coconut, gram dal, green chillis, ginger, tamarind and enough salt.
Add a few tbsps of water, just enough to blend all the ingredients together.
Serve with dosa or idli.
Enjoy!

P.S: If diluted, the chutney can be used as a dip for samosa, pakoda and all.

Thursday, August 1, 2013

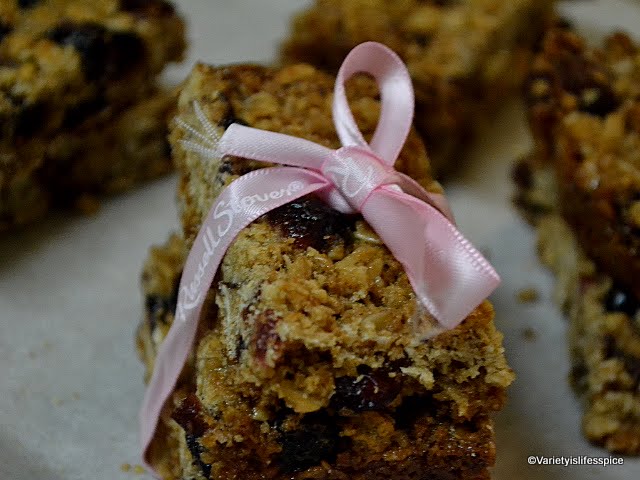
Granola bar


Are you a morning person? I am not. I can stay up late in the night, but getting up early is a no no for me.
If you are like me these granola bars are your life saver. I love having it as a snack, but these energy bars can be perfect grab n go breakfast too...
I have to eat when I am hungry. I mean, I am a hangry person. Hunger pangs makes me angry.
These granola bars have saved me in those situations. Especially on those days when you have a bit of long drive back home after work, or you had a light breakfast and its not lunch time yet.
Even otherwise I like to munch on this crispy bars of delight.

I used to buy them from the grocery stores, until one day I found these yummy granola in a near by farmers market. I bought some and thought, why not try to make some granola bars of it...brilliant idea, huh?

It's not that a big deal to whip these up, if you have the ingredients handy.

Here is the recipe : Adapted from Ina Garten's recipe here

You will need:

Old fashioned oatmeal: 2 cups *
Toasted wheat germ; 1/2 cup
Unsalted butter: 3 tbsp
Light brown sugar: 1/4 cup
Honey: 2/3 cup
Vanilla extract: 1 1/2 tsp
Salt: 1/4 tsp
Almond: 1 cup (sliced)
Dried apricots: 1/2 cup (chopped)
Dried cranberries: 1/2 cup
Raisins: 1/2 cup

* I substituted 1/2 cup of oatmeal with store bought granola.Not necessary.You can follow the original recipe. Also you can mix and match different nuts and dried fruits of your choice.

How to make:

Preheat oven to 350 degree F.
Grease a 9 x 13 inch baking pan and line it with parchment paper.
Toss the oatmeal, almonds together on a sheet pan and bake 10-12 min, stirring occasionally, until lightly browned.
Transfer the mixture to a large mixing bowl and stir in the wheat germ.
Reduce oven temperature to 300 degree F.
Place butter, honey, brown sugar, vanilla extract and salt in a small saucepan and bring to a boil over medium heat. Cook for a couple of min and pour over the toasted oatmeal mixture. Add the dried fruits and stir well.
Pour the mixture into the prepared pan and press it down using a spatula or by hand.
Bake for 25-30 min, until golden brown. Cool for 2-3 hrs and cut into desired shapes.
Store in an airtight container.
Make sure you have a couple of these in your hand bag before you step out :)


Wednesday, July 24, 2013

Pakkavada/Ribbon pakoda (A savory Kerala snack)


There are a few staple snacks my mom, my grand mom used to make when we were kids.They make them in bulk occasionally and its stored in airtight tin boxes. Me being a savory persons always loved them.
My mom used to make spicy mixture (my cornflake mixture is an easy version of it), pakkavada, kaya varuthathu (raw plantain chips), chakka varuthathu (raw jackfruit chips), masala peanuts, Murukku.....the list goes on and on.
The ones you get in the stores, i mean the bakery shops, small chips shops near bus stand n railway station in Kerala are equally good. They make it in pure coconut oil....yummm ...divine :)
I always make my dad buy a couple of bags of these whenever I travel by bus or train for studies/work.
Life was pretty easy then. Anyway gone are those days...

Recently, while browsing through my mom's recipe collection (of which we all 3 sis have made a copy of), i came across the pakkavada recipe.
Seemed simple, just a few ingredients. And also i had the gadget, the idiyappam press/mold (I got mine from my MIL,she got it from her MIL).

This is how it looks


Here is a link to the modern version of it.
http://www.perfectpeninsula.com/KitchenPress.html
I have seen this in a few Indian stores around. But the old ones are really sturdy and durable.

Here is the recipe.

You'll need:

Besan / Gram flour (Chickpea flour) : 2 1/2 cups
Rice flour : 1 cup
Asafoetida : 1/2 tsp
Red chilli powder :  1 1/2 tsp
Melted butter: 1 1/2 tbsp
Warm water : enough to make the dough (approx 1 1/2 cups)
Salt : to taste
Curry leaves : a few sprigs (for garnish)

How to make:

In a mixing bowl, combine besan, rice flour, chilli powder, asafoetida, salt and melted butter.
Add warm water little by little and knead it into a smooth dough. It might be a little sticky, apply a little bit of oil on to your palms to keep the dough from sticking. But the consistency must be looser than the regular roti dough.
Put the narrow slit disc in the press and fill it with the dough by hand or by a spoon.

Heat oil in a deep frying pan. When it gets sizzling hot, pipe the dough into the oil slowly and carefully in a circular motion. Fry until it gets golden brown in color, and drain them on to a paper towel.
Do it in batches. Once done, turn off the heat and immediately add a few springs of curry leaves to the oil.
Be careful, it will splutter !!
Fry just for a few secs, drain and mix with the pakkavada.
Enjoy the anytime yummy snack :)

Thursday, July 4, 2013

Blueberry Muffin


I like muffins...they are cute :)  its easy to make, and its yummy.

Though muffins are considered a complete healthy meal elsewhere, in my house its always treated as a snack..Say, I make some sweet or savory muffin in the morning, everyone( read husband) eats a couple of them  and then after a while, here comes the question "what is for breakfast"..... are u kidding me?
but still I make them quite often as some evening snack...


I always love the jumbo blueberry muffin you get in the coffee shops... the juicy baked fruit that oozes out when you split open one, its divine :)
Take it from me, this is one easy on the go breakfast for all you busy bees out there. Make them ahead of time, and they do stay fresh for a day or two.


You'll need:

All purpose flour : 2 cups
Sugar: 1 cup
Butter: 1/2 cup (softened)
Baking Powder: 2 tsps
Egg: 2 nos
Milk: 1/2 cup
Salt: 1/4 tsp
Vanilla Extract: 1 tsp
Blueberries: 1 cup (fresh or frozen)

How to make:

Preheat oven to 375 F. Line or grease a 12 cup muffin pan.
In a bowl, sift together the flour, baking powder and salt until well combined.
In an another bowl, cream softened butter and sugar using a mixer. Add eggs one at a time. Mix in milk and vanilla extract.Add the dry ingredients mixture into this, and beat it just until moistened. Fold in the blueberries. Fill in the prepared muffin cups 2/3 full.
Bake in the preheated oven for 20-25 min or until a tooth pick inserted into the center comes out clean.
Cool on a wire rack before serving.

Notes:
These muffins are good as such without any toppings. If particular about topping, mix 2 tsps of sugar and 1/2 tsp of ground nutmeg and sprinkle it over, after filling up the muffin tins.


Sunday, June 30, 2013

Peanut Chikki/ Peanut Brittle (Kadalai Mittai)


I like to call it kadalai mittai...no, kappalandi mittai to be very precise....thats what we call it in our place :)
an all time fav of all desis (Indians)....we always had a bag of this in our snack shelf..
I have not seen my mom make this at home...dont know why, may be because we used to get it in every other grocery store in my hometown, even in the tiny petti kadas (small convenient stores near the houses)


After coming to the US, we always had to depend on the Indian grocery store to get some chikki...but sadly, most of the time we had to compromise with stale or kind of cold, not crisp, not so fresh chikki....
and that made me look for the recipe for chikki in the web....and surprisingly got to know its not that very difficult to make some home....but let me warn you first, you have to try it a couple of times to master the right consistency and the timing factor...i have had my share of flop attempts too :)
but once you get the grip on it,  its a piece of cake.


You can either use roasted unsalted peanuts or get raw peanuts and roast them in the microwave.
I always buy raw peanuts in bulk and roast them in microwave.It hardly takes 4-5 mins...

Here is the recipe

You'll need:

Peanuts: 1 cup (roasted & unsalted or raw peanuts roasted in microwave)
Sugar: 3/4 cup
Ghee: 1/4 tbsp
Baking Soda: a pinch

How to make:

Spread the raw peanuts evenly in a single layer in a microwave safe plate. Microwave it for 2 min on high.
Let stand for a couple of min, take it out of the microwave, give it a stir and put it back in the microwave for another one min.
Repeat the process until the peanuts are roasted. Usually it gets done in 4-5 min. It might still look raw when you take them out of the microwave. When it cools down, it will have the perfect crunch...
Make sure you don't burn them...
Not in a mood to do this, always go for store bought roasted ones :)

Heat a pan and coat it with ghee and add the sugar. Sugar will start melting and change into amber color.
The consistency of the sugar syrup is the key. And also mixing it with the nuts and spreading it fast.
Once the sugar starts changing color, immediately pour a drop of it into a bowl of cold water. If it crystallize, then its the right texture.
As soon as the color starts to change, take it off the stove, add a pinch of baking soda and immediately add the roasted nuts and mix well.
Pour this gooey mixture into a greased pan and flatten it use a rolling pin.
Or use the greased bottom of an another smaller pan, to press down the mixture.
Once cooled, break down into desired sized pieces.
Store in an airtight container.

P.S: It might take a couple of attempts to get the right consistency of the sugar syrup....so I would suggest always try with a smaller quantity first. But I promise you'll get there :)
Also you can use other nuts like cashews, almonds, pistachio etc along with the peanuts to make it a healthy energy bar :)


Total Pageviews

Powered by Blogger.