Showing posts with label Condiments. Show all posts

Friday, November 14, 2014

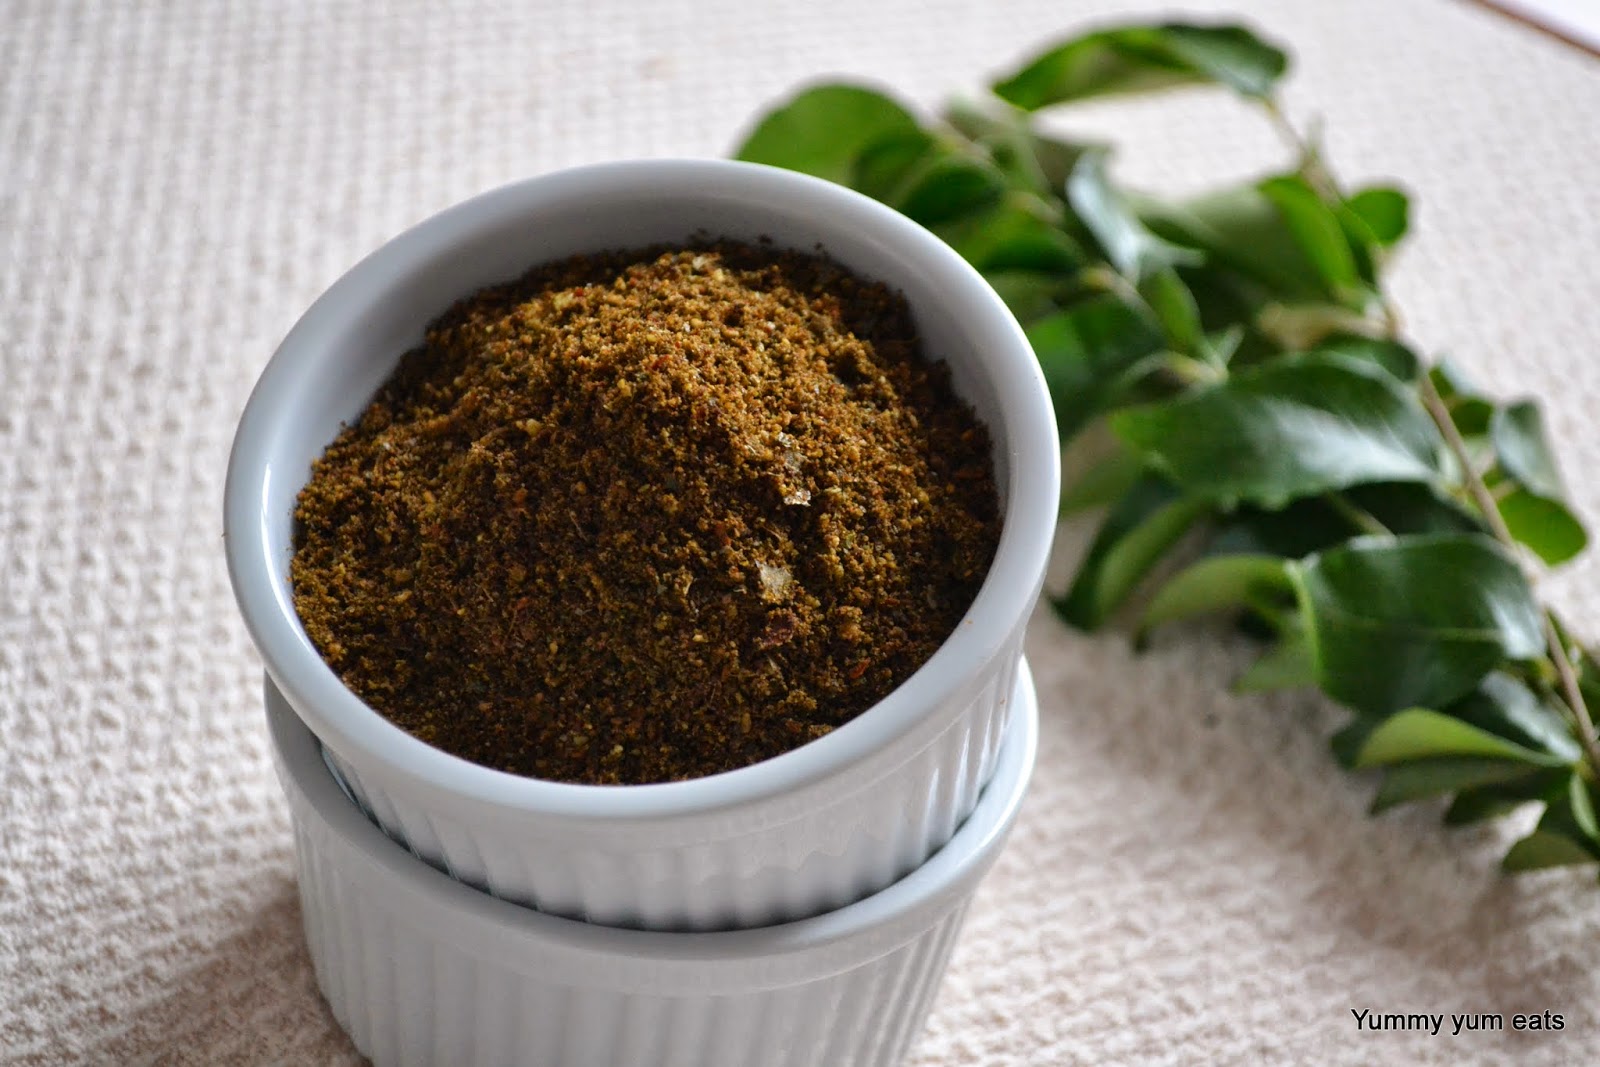
Vepilakatti (Curry leaves chutney powder)


I graduated from a college far off from my hometown.I used to stay in the college hostel and got to visit my home maybe like once in a month or so. My mom used to pack me all kind of stuffs to eat, say pickles n snacks and what not. The hostel only provided vegetarian food, which was fine with me, but the menu they had was way too different from ours.Then I used to literally survive on these goodies my mom used to sent me with.Not only me, but my roommates and friends also loved them. After college, we get back and munch on the homemade snacks amma made along with the watery cup of tea.
Every time I go to the canteen, I will have a bottle of pickle or some chutney powder, which would help us with that meal of the day.I really don't know how I would have survived without those..Thanks to amma, lots of things we have in life is taken for granted..I guess this is one of such things..don't think we have thanked amma enough for all she had done for us sisters.She used to do the same for all three of us, who all stayed away from home for studies and work.Nostalgia creeping in, i guess..Before I bore you more, let me get on to today's recipe.
Its called vepilakatti, which is curry leaves chutney powder. "vepilla" is the malayalam word for curry leaves.
The best thing about vepilakatti is,it stays fresh for almost a month without refrigeration.
Amma used to send things that stays fresh without being kept in the fridge, yeah, of course we didnt have access to a fridge in our college hostel. And all these dry chutney powders saved a lot of us.
Even today, this is my go to food when I am sick or feeling low. Vepilakatti, steaming hot rice and curd. Nothing the world can beat this combo.

Vepilakatti (Curry leaves chutney powder)

Nikki
Published 11/14/2014

Ingredients

  • Curry leaves: 2 cups, loosely packed
  • Grated coconut: around 4 cups (from one coconut)
  • Shallots: 10 nos
  • Dry whole chili: 7-8nos
  • Tamarind: a small lemon sized piece
  • Oil: 2 tbsp (preferably coconut oil) 
  • Salt: as per taste

Instructions

  1. Wash and dry the curry leaves on a kitchen towel. Peel the shallots and cut into halves.
  2. Heat oil in a pan on medium heat.Add the whole chillis and fry for 2 min, add the shallot pieces,grated coconut and fry for 5 min.
  3. Add the tamarind piece and the curry leaves and stir well continuously until the coconut turns slightly golden brown in color and becomes crispy.
  4. Turn off the flame and let it cool for a while.Once completely cooled, transfer to a mixer, add the salt and grind to a fine powder.
Store in an airtight container. Stays fresh in the pantry for 3-4 weeks.Make sure you use a dry spoon every time you devour it :)

P.S: Feel free to add more curry leaves if you have it on hand.

Thursday, October 23, 2014

Pudina thogayal / Mint thogayal (Mint chutney)


Mint has a very distinct flavour compared to coriander leaves or cilantro, which is a staple herb in every Indian kitchen.
In the part of the world were we live, we don't get mint that commonly in the market as we find the other herbs. So we tend to use it rarely and only when its an unavoidable ingredient .like say for Biriyani. I would say mint flavour is the heart of a tasty chicken biriyani...
But luckily, the place we stayed earlier, we had a abundant mint supply in the backyard itself. After months long of dead winter, one fine day i would wake up to see this surprising new sprigs of mint. The first time I saw it, i was totally taken aback.really, how did it survive this severe winter and snow. I used to have a lot of them that I could share a bunch every now and then with my friends too.Our house used to smell heavenly when we cut a fresh bunch of them.

Because of limited availability, my options with mint were also limited, say in biriyani and this mint chutney occasionally.
Now since I had this surplus mint supply, went out looking for more ways to use it.
And found a delicious thogayal (chutney like paste) at rakskitchen. My mom had made it a couple of times earlier and I had liked it then. So thought of giving it a try. And it is good. I like the tang of this thogayal. It refreshes you :)
Easy to put together, a very few ingredients too
Goes well with Idli, dosa, also as a condiment with rice.
Can be used to dress up a plain old cracker or a toast too, more like a spread.

Pudina thogayal / Mint thogayal (Mint chutney)

Nikki
Published 10/23/2014
Adapted from here

Ingredients

  • Mint leaves: I cup (tightly packed)
  • Whole red chillies: 10-12 nos
  • Urad daal: 2 tbsp
  • Grated coconut: 2 tbsp
  • Tamarind: a small piece (in size of a gooseberry)/ 1/2 tsp, if using paste
  • Jaggery: 1 tsp
  • Salt: 1 1/2 tsp

Instructions

  1. Place a nonstick pan on medium heat and dry roast whole chillies and urad daal until it turns golden brown.
  2. Add the mint leaves and tamarind and cook for a minute, until the leaves wilt and reduce in volume.
  3. Let the mixture cool down, once cooled, grind it into a smooth paste along with grated coconut, jaggery and salt.

Tuesday, October 21, 2014

Chunky Peach preserve


Ok, let me not start with my usual lame excuses for not updating this space for quite a long long time.
Because I don't have any good one expect for the fact that I was lazy. there you go.. i said it.
You call it writers block, lack of mojjo or whatever, I say its plain old laziness.

So now you would be wondering why I am writing this post....hmmm
A few days back my dear hubby was telling me, "Failure to plan is planning to fail".
C'mon, its me who get to use all the "quotes" in this house.( of course on him ;) )..you know..men men men
And for the first time he got to use one on me...oh no! it felt like one tight slap
Any way, I hope I will post more frequently here after....I have to...at least to save my face

Its always towards the end of summer I get the urge to utilize the abundant supply of stone fruits that summer offers and preserve them for the rest of the year. I guess, one reason for that is, I don't want to let go of the summer...and also because I find it really hard to embrace fall n winter...yeah I hate cold weather and all that comes with it....The very sight of peaches, plums, nectarines all their cousins on the fruit stand in the farmers market makes my day. its such a visual treat..I love summer and all these yummy fruits. 


This peach preserve is a very versatile thing..can be used in a cake, or in a pie or use as a topping in any kind of pudding desserts,ice creams or simply just spread it on your Sunday morning toast and enjoy :)

Chunky peach preserve

Nikki
Published 10/21/2014

Ingredients

  • Peaches: 3 lbs (ripe and firm ones)
  • Sugar: (5 cups)*
  • Lemon juice: 2/3 cup

Instructions

  1. Wash and dry the fruits and cut a X on the rounded edge.Bring a large pot of water to boil and add the peaches to it, a few at a time and blanch them for 30 sec.
  2. Transfer to a bowl of ice water immediately to stop cooking. Let it cool, once cooled peel them from the X cut we made.
  3. Cut each peach into 6-8 wedges and each wedge into 3 pieces. Put them in a large bowl and add sugar and lemon juice and mix well. Let it stand for a few hours or even overnight, stirring it 2 -3 times in between until the sugar dissolves completely.
  4. Transfer the mixture to a large pot and cook it on moderate heat for 25- 30 min , until the syrup thickens and the peaches become soft.Skim off any white films that collects on the surface while cooking.
  5. Let cool the mixture, cover and let it rest overnight. Drain the fruits from the mixture using a sieve and set aside. Bring back the syrup to a boil on moderate heat for a few minutes, until it reaches the jam like consistency. To check the consistency, pour a spoonful of the syrup in a chilled plate and wait for a couple of minutes to cool down. If it thickens to a jam like consistency, you have got it rite.
  6. Add back the drained fruit pieces to the syrup and mix it all together and cook for a couple more minutes.
  7. Remove from the heat, let it cool and transfer to jars and wipe the rims with clean cloth. Crack open the lid until it cools down completely. Once completely cooled, tighten the lids and store in a cool place.


*I used only 4 cups of sugar in mine, because I like things less sweet. Adjust it to your sweet tooth level by tasting the mixture.

P.S: I leave mine in the pantry and it stays fresh for almost a year. You can also refrigerate it, if you want to keep it longer

And I'll see you all soon....i'm not kidding ;)

Monday, August 5, 2013

Mint chutney / Pudina chutney with coconut recipe


I love backyard gardens. I always wanted to have a backyard garden ever since I got married. Not that I have one now, but these days we live in the ground floor, and I have a little space around our patio, which i try to turn into a small vegetable garden.
I have got this from my mom.Have you ever wondered how most of our habits, likes, dislikes, we get from our parents.I guess, that is what these genes do, huh?
My mom always keeps here backyard garden active with the seasonal plants. And I have seen her proudly sharing her farm fresh produce with her neighbors :)


Surprisingly this spring, I started seeing a few mint plants in my so called garden, which gradually took over the entire space. I said surprisingly, because I didn't plant them. I assume the previous tenant would have had some, but this is the first time I am seeing mint leaves spreading like weeds.
Anybody passing by smells these wonderful herb, and asks me, is that mint (read, can I have some of those mint leaves)
Even I share much of it with my neighbors, because i use mint only for biriyani and bombay sandwich chutney. (now you see the genes thing I said above, right ;)
I usually make coriander chutney for dosa and idli. But have tasted the mint chutney in some authentic Tamil restaurants.I love the tang of this chutney.
Now that I had some much of mint leaves on hand, I made this chutney for a change. I liked it.

Here is the recipe.

You'll need:

Mint leaves: 3/4 cup (loosely packed)
Grated coconut: 3/4 cup
Roasted gram daal (Pottukadalai) : 2 tbsp
Ginger: a small piece
Tamarind: a small piece
Green chilli: 3-4 nos
Salt: as per taste 

How to make:

Wash and drain the mint leaves.
Heat a pan on medium-low flame and saute the mint leaves, until it shrinks in volume.
Grind together the mint leaves, grated coconut, gram dal, green chillis, ginger, tamarind and enough salt.
Add a few tbsps of water, just enough to blend all the ingredients together.
Serve with dosa or idli.
Enjoy!

P.S: If diluted, the chutney can be used as a dip for samosa, pakoda and all.

Thursday, April 19, 2012

Lime/Lemon pickle


My mom makes a lots of pickles and jams.there is this one corner shelf in our kitchen cabinet where she puts them neatly bottled and dated. The wonderful aroma you get when you open that shelf is mind blowing...
Mostly it will have a few pickle bottles from my grandma too...she is a great cook and always packs us a few bottles of her specialties, every time we visit her.

So, no wonder I have a small shelf in my kitchen with pickles, jams and fruit preserves...i get it from my mom...and she gets it from her mom....its in the blood...can't help it :)
I started having  this habit rather unknowingly or out of necessity, i mean as a last resort that saves me from throwing slightly over ripened fruits...like when I had some extra pear which no one was eating, i made pear jam...a few seeded oranges in the fruit basket, which no body wanted to munch on...bcoz its pitted, then it turned into orange marmalade...and so on

But I had never tried my hand on lime pickle before...I like mango pickles a lot...but every time i make biriyani, i would love to have lime pickle with it..but tried a few store bought ones, which were not only bad, but gave us bad heart burn too...i guess its the preservatives in them...
my aunt makes a sweet and sour lime pickle which is the best one to have with biriyani...even my mom got the recipe from her sis and mastered it...thats my next attempt in pickle making for sure ;)

this one is a simple easy to make version, which is now my new favorite :) my dad will love it too...i know...he eats a lots of pickle these days (not good for his health)...so my mom has almost stopped making them these days...
last time i got home, there were hardly 2-3 bottles in the corner shelf...which is so much not like her...

Recipe is adapted from here
http://www.kothiyavunu.com/2011/09/naranga-achar-naranga-kari-authentic.html
she has a lot of yummy recipes in there, especially naadan kerala ones....God's own country delicacies :)

You'll need:


Yellow/Green Lime: 12 nos
Garlic: 12 cloves, finely chopped
Whole dried red chilli: 5 nos
Chili powder: 4 tbsp
Turmeric Powder: 1tbsp
Asafoetida: 1/2 tsp
Fenugreek seed powder: 1/2 tsp
Mustard seed: 1 tsp
Gingely oil: 1/4 cup
Vinegar: 2 tsp
Curry leaves: a few sprigs
Salt: as required

How to make:


Wash the lemons and dry them well with a paper towel.
Heat 1 tbsp oil in a pan and put the whole washed lemon into it.(The original recipe calls for cooking the lemon in water for a few min)..But i have seen mom doing it this way..follow which ever method you like..
Stir the lemons in the pan for abt 5 min and drain them on a paper towel.
Once cooled, slice each lime into 8 pieces.
Add salt and mix well. Transfer it into a air tight bottle or jar and keep for 10 days, shaking the jar once in a while.
When ready to make the pickle, heat oil in the pan and add mustard seed and let it splutter. Add curry leaves and red chilis.
Add the chopped garlic and saute till its golden brown in color.
Reduce the flame to medium-low and add chili powder, fenugreek seed pwdr, turmeric pwdr and asafoetida pwdr and mix well and saute on low flame for a few seconds.
Add the lime slices along with the water and cook for a few min.
Allow it to cool and add 2 tbsps of vinegar. Add salt as per taste.
Once cooled, transfer to an air tight container or jar and store it in cool place.
Lime pickle is ready :)..don't forget it next time you make biriyani :)
I have it with everything these days....finger licking good :)

Total Pageviews

Powered by Blogger.